Angraecums

Angraecums
Angraecum leonis

Thursday, August 29, 2013

LAVA ROCK as a potting medium... PROS & CONS

a post by Craig Morell (Pinecrest Gardens) and
Tom Kuligowski (Angraecums.blogspot.com)


       Although this page in the blog is dedicated strictly to the culture of various Angraecoids, I though it advantageous to look into the possibility of using lava rock as a potting medium  Most of the Angraecoids I grow are mounted to various hard woods, cork or tree fern material.
       With some very surprising results observed from growing a few other genera of orchids with lava rock; I thought it time to try a couple of my larger hybrids of Angraecums in lava rock as well.  While attending the Redlands Orchid Festival this past spring, I heard of a vendor that was selling Angraecum Memoria George Kennedy.  (The sad part of the story is that I never did find them.)
       I had the opportunity to tour an orchid grower's greenhouses while in Durham, North Carolina to give my Angraecums presentation to the Triangle Orchid Society.  In one of the greenhouses, I spot not one but four Angcm. Memoria George Kennedys; all four were in perfect shape and in six inch clay pots with nothing other than 100% red lava rock.  John Stanton, the owner of Orchid Trail Nursery, told me that he had just repotted the four plants several weeks prior to my visit.  I told him  the story of my search at the Redlands show and the fact that I came up empty.  To make a long story short, about ten days after my visit to North Carolina, I received a box via FedEx containing all four plants.
       As well as the plants had been packed, three of the pots were completely shattered.  Looking on the brighter side of this issue, I did get to inspect the root systems very closely and was amazed as to how much the roots had developed and actually flourished.  Keep in mind though that the plants are going through their peak growing period during the warm weather season.
       My decision to experiment with lava rock is based on the results I have observed after mounting a Dendrobium rigidum to a large piece of red lava rock.  This particular species is known to be a slow grower; but I was told to mount it to red lava rock; that Den. rigidum would take advantage of the iron content as well as the other minerals within the rock.  The plant has tripled in size in just eight months.

 
       When growing orchids, we must always keep in mind the sometimes overwhelming variables with which we deal.  Variables include types of fertilizers, pH of the irrigation water, light quality and intensity, as well as other chemicals we use on our orchids.  Of course, the types of media we use as potting materials and use as orchid mounts can make quite a difference.  In this post, lava rock is the medium I will investigate further.
       Information gathered over the last few weeks has given me a better understanding as to what is happening and what can happen when using lava rock.  I have not used anything other than the red type.  A geologist has confirmed that there is an iron content within the rock.  Needing to know what other minerals may be available to plants when exposed to this material was also important to determine the other avenues in which the plants may possibly thrive.
       I find it ironic that the first three minerals listed that are found in red lava rock are nitrogen, phosphorus and potassium (the three main components represented by the three numbers you find on plant fertilizers' containers).  Other minerals are zinc, iron, copper, magnesium, boron, sulfate, calcium, manganese and sodium.  The above minerals are not in a form that can be absorbed by the plant.  A plant's root system releases organic acids such as citric acid and oxalic acid.  These acids turn the solid minerals into a form that can be absorbed and used by the plant.  To the average lay person or hobbyist, this lone paragraph would lead us to believe that the minerals contained in red lava rock would give our plants a jump start in their growing patterns.  This can be very true; but as I said earlier, there are "...overwhelming variables with which we deal".
       There are numerous considerations in choosing red lava rock as a potting medium for your orchids.  Depending on where you live, you may not have good access to the medium.  The lava rock should be washed thoroughly before using; it has a LOT of fine dust particles which can affect the orchid roots badly, as well as make a mess underneath the pot or basket after watering.  Irrigation water pH will make a large impact on whether the medium is successful or not.  High pH water (over 8) will eventually lead to calcium buildup on the lava rock, as well as make many of the minerals and metals contained in the lava rock unavailable to the plant.
       Many of the Cymbidium tribe of orchids grows beautifully in lava rock; but the combined weight of the rock and a large plant preclude it from being used as a medium in hanging baskets.  One of the major down-sides to lava rock is that it will hold a lot of water on the center of the pot; especially in pots over 8" in diameter.  Many growers will use an inverted plastic pot in the center of the larger pot to allow extra airspace in the center of the pot when using lava rock to further air and water drainage.
       Various growers report differences in lava rock from year to year; in some cases, orchid roots will turn away from the medium and in other batches of rock, roots will flourish in the rock.  Growers do report that certain genera seem to disfavor the lava rock.  Brassavola seem to shy away from it, as do some terrestrials.  Growers of Aroids (such as Philodendron, Anthurium, Monstera etc.) find lava rock to be an ideal medium and in Hawaii it is the favorite medium for stock plant production of many flowering plants.
       If nothing else other than giving a plant with a fairly thick (velum material) root system; the roots will have a quick drainage when watered and ample space to breath.  My suggestion is to talk to someone that has had experience with lave rock as a medium.  Keep in mid, what works for one may be detrimental to someone else.
       For those of you that are using lava rock now or have in the past; please leave your experiences and thoughts to the matter in the comments section just below this post.  Thank you all! 


Monday, August 5, 2013

Eurychone rothschildiana

       Eurychone rothschildiana was formerly know as Angraecum rothschildiana (still considered the synonym).  The plant originates in Tropical West Africa and east to Uganda and Zaire.  Commonly found near small amounts of moving water and at elevations up to 3900 feet (1200m) in evergreen forests.

Eurychone rothschildiana (1st time with buds)
 
       The plant pictured above is an older seedling that is in bud for the first time.  Having a group of three seedlings, two were mounted to rough cork slabs (average size about 6 x 4 inches (15x10cm) in height and width and one was potted in a three inch (8cm) clay pot.  Those mounted to the cork slabs were laid on a loose and thin layer of moss and covered by small pcs. of coconut tree fiber to protect the outer most roots.  The sole plant that was potted is in a mostly non-organic mix with about a 10% amount of medium coconut pieces.  The entire mix is medium in size for fast drainage letting the root system partially dry after watering.
       Eurychone rothschildiana is a compact plant that will have a short monopodial stem.  Specimen plants will rarely have a stem reaching 4 inches (10cm).  There can be anywhere from 3 to 8 broad egg shaped leaves that are up to 8 inches (20cm) long and 2.8 inches (7cm) wide.  As with all Angraecoids, the leaves are distichously placed along the stem.  They have a leathery substance and range from a medium to dark green.  The roots are .1 to .2 inches (.3-.4cm) thick.
       Depending on the climate in which you are growing Echn. rothschildiana; special attention should be made to the temperatures that the plants are exposed to.  In its natural habitat, the warmest daytime temps average only 81 degrees F (27 degrees C) while in cooler months the average daytime temperature is 71 degrees F (22 degrees C).  This plant should do well in temperate climates within greenhouses that can keep this range along with a relative humidity range of 71% - 84% year round with the higher humidity levels being during the summer months.  Here in sub-tropical South Florida, while plants are grown in open aired greenhouses or arbors, it is important to keep the plants cooler during the extreme warm months of late spring into early fall (almost a six month period of temperatures 10 - 15 degrees F (8 degrees C) higher than that of the plants natural habitat.  This can be accomplished with a constant strong air movement.
 
Echn. rothschildiana
 
       The active growing season can last up to ten months.  Only coming to a rest period during a short winter dry period.  During the active growing season, plants should be watered very regularly.  Mounted plants during the hot summer months up to twice a day; which can help with the humidity levels.  Potted plants should be watered every two to three days as long as the drainage is fast.  You must also be careful not to let water sit in the crown for any length of time.  Giving the root system an opportunity to slightly dry.  During the two month rest period, the plants should be watered enough to keep them from drying completely.
       I use a standard 20-20-20 fertilizer every 7 days during the active growing season while backing off to every three weeks for the two month rest period.  A systemic fungicide such as Thyomil is used to treat the entire plant as well as the root system and is switched to Dithane 45 every third month to prevent a resistance build up.  There is always the possibility of minor issues arising so a quart spray bottle with Physan 20 is kept on hand for spot problems.  Keeping a constant air flow also helps prevent serious problems from developing with fungus.
       The amount of light that Echn. rothschildiana is given ranges from 1000fc - 1800fc.  Both of the mounted plants are in an area that is actually a bit lower.  They receive absolutely NO direct sunlight during any part of the day; in other words they are in what I consider a low Phalaenopsis type of light.
 
Eurychone rothschildiana
 
       Eurychone rothschildiana will bloom here in the northern hemisphere throughout most of the year.  It is most likely to bloom in July and least likely to in the cooler winter months.  Mature plants can bloom at any point though.  The inflorescence is pendant like and will range in length from 1.2 - 3.5 inches (3-9cm) and can carry 3 - 6 flowers.  Mature specimen plants have been know to have as many as a dozen blooms.  The blooms are fragrant and have white to light green sepals and petals with the lip being white edges turning to green and then a dark maroon or brown throat.  The flowers average just under 1.25 inches (3cm) wide by 1 inch (2.5cm) high.  The lip can be 1.1 inches (2.7cm) long by .8 - 1.0 inches (2-2.5cm) wide.  It is very concave and scalloped around its edges.  The spur is narrow in the middle and swells at the tip; its length is .8 - 1.0 inches (2-2.5cm) long.
       As mentioned earlier in this post, Echn. rothschildiana is a compact plant.  Potted or mounted, it will do well in a sub-tropical climate as well as the colder climates in the northern hemisphere.  Be well aware of the fact that it will freeze if placed to close to a window during harsh winters. 
       There is one oddity about this plant you should realize.  It is known to be short lived.  A healthy mature plant can die suddenly without warning.  I have not experienced this issue myself; but have had several discussions with Craig Morell, the horticulturalist at Pinecrest Gardens in Miami, Florida.  He has had several well cared for mature specimens die suddenly for no apparent reason.
       One last note: Eurychone rothschildiana has been crossed with Aerangis and Angraecums to create at least three hybrids to date; Euryangis Victoria Nile, Eurygraecum Lydia and Eurygraecum Walnut Valley.  The last two being created by Fred Hillerman.  


Saturday, June 1, 2013

New Plant; Re-Pot NOW!

     When purchasing a new plant, don't let it sit around for any length of time.  Get it out of the pot it is in, change the medium out and watch it hopefully bloom and become a phenomenal specimen.  I do realize there are occasions where you can leave your new orchid in the pot it came in; but understand this, you really have no idea as to how long the plant has been in the present pot (usually plastic), how long it has had shredded packaging material taped to the top of the pot and how moist (saturated) the potting medium is.
     Most growers use bark, coconut pieces or moss when growing their inventory.  As I just mentioned, sometimes it is advantageous to leave things as they are; but there are often times you should change everything as soon as you bring it home with you.  I do not fault any of the growers for their methods of packaging.  Very often, what they do not sell is shipped to the next destination (show) and usually restock what they are short of.  Many of the plants are in plastic and are watered prior to having a packing material (shredded paper) taped to the tops of the pots.  The plants will not dry out that way.  However, keep in mind, bark and coconut are an organic growing medium and will hold moisture very well.  Being in plastic with very little drainage creates the following issue.
 
Angraecum Lemforde White Beauty
 
     I recently purchased an Angraecum Lemforde White Beauty at a local orchid show.  It was in a four inch (10cm) wide plastic pot with minimal drainage (a small opening in the bottom).  The medium appeared to be a fine red bark that looked newly applied and was very clean.  Upon tilting the pot to get the plant out of its container, the red bark material spilled out showing me that it had been just a thin layer covering the actual medium.  After working the pot by squeezing it completely around its circumference, the plant was liberated from its container.
     The first thing I noticed is that the root system was very well developed.  The issue was the medium used was all coconut pieces (holds a large amount of water) and was extremely saturated beyond being moist.  With the poor drainage and abundant amount of water, the root system was starting to show signs of decay.
 
Basal Section of Angcm. Lemforde White Beauty
 
     Organic growing materials break down or decompose.  That same medium when saturated for long periods of time will decompose at a faster rate.  With poor drainage and no air giving the root system an opportunity to slightly dry; there is a better than good chance the roots will begin to rot or start to decay themselves.
     As long as the roots are exposed to the saturated medium, it is only a matter of time before the velum material surrounding the actual root will begin to decay.  Usually the root material will start to turn black or darken drastically.  The image below show several area where this decay has started taking place.
 
Beginning Signs of Root Rot
 
     I removed the original coconut medium and lightly washed the decayed material out of the root system.  As much as I talk about NOT messing with the root systems of most Angraecums due to their sensitivity, I cut away all of the infected root to try and eliminate the rot from spreading.  I treated the entire root system with a topical fungicide (Physan 20) and then placed the plant in a six inch (15cm) wide clay orchid pot (they have the vertical slots cut into them on three or four sides).
    Most of the new potting mix was non-organic such as charcoal, perlite, sponge rock,  1/2 inch (1.3cm) diameter clay pellets and a small amount of tree fern material with about a 10% amount of coconut pieces (to hold a small amount of moisture).
     I did not water the plant for three days, giving it a chance to dry some what.  When I did water the orchid for the first time, I used a systemic fungicide (Thyomil) in the water to give the plant a better opportunity to fight off any further development of root rot.  I am currently keeping a very close eye on my new Angraecum Lemforde White Beauty.  I will give an update to its condition in about three or four months.
     You can check a new plants root stability before purchasing it by using your thumb and forefinger.  Gently grab the base of the plant near the surface of the medium and gently wiggle it.  If the plant does not really move much or at all, the chances are good the the root system is solid.  If the plant moves freely, there is always the possibility that there is an issue with the root system.  It is always in your best interest to re-pot ASAP after purchasing a new orchid.  If there is an issue, don't hesitate to talk the the grower where you got your plant.  If you talk to him in a reasonable amount of time, he will or should make good on the issue.
  

Thursday, May 16, 2013

Angraecum germinyanum

     Most of the posts on this page up until now have concentrated on established plants that have bloomed numerous times.  This post will concentrate on the development of a seedling and a plant blooming for the first time.  Both were gifts and required the utmost care in their early stages of growth.  I believe that there is nothing more exciting in an orchid collection than seeing a plant bloom for the first time.
 
Angraecum germinyanum
 
     Angraecum germinyanum original habitat is on the central plateau of Madagascar with elevations between 2950 - 4900 feet (900-1500m).  The plant is considered to be an intermediate to warm grower due to the drastic temperatures of its natural habitat with a high of 93F and a low of 33F (34C - 0C).  The average maximum temps usually range from the low 70s into the mid 80s (22C-28C).  The low temps are reported to have an average of 49F to 62F (9C-16.5C).
     When I received the plant that would initially bloom for the first time, it was in a 2 inch (5cm) plastic pot with bark as the medium.  The stem was just over 4 inches (10cm) tall and covered with very green leaf sheaths.  The leaves are about 2 inches (5cm) long and have a very bright green shine to them.  The root system within the growing medium is just about 2mm wide.  The aerial roots are thinner.  Very mature plants have been reported to be near 40 inches (100cm) tall with 3 - 5 branches extending out nearly 20 inches (50cm) out from the main stem.  This however is rare to find in the wild as well as culture.
 
Singly borne flowers opposite the leaf axil
 
     Flowers are borne singly from opposite the leaf axil with a pedicel of 1 1/4 inch (3cm) long.  The pedicel is connected to a peduncle which usually is less than a 1/2 inch (1cm) coming from the stem.  Angcm. germinyanum flowers can reach a length of 5 - 6 1/2 inches (15-16cm) long.  The lip is turned up (superior type lip) and is 3/4 - 1 inch (1.7-2.3cm) high and wide with a pointed tip at the top of the lip which is about 7/8 inch (2cm) higher.  The sepals and petals are 2 3/4 - 4 inches (7-10cm) long with the petals crossing under the lip.  Both the sepals and the petals are twisted.  The spur is 4 1/2 - 5 1/8 inches (12-13cm) long.  Angcm. germinyanum is not a fragrant flower; but its unusual twisting and unique shape make up for that.
     Once the plant was finished blooming, it was placed in a 4 inch (10cm) terracotta pot.  A medium sized non-organic mix (charcoal, sponge rock and perlite) with a small amount (10%) of coconut pieces was used.  The root system within the medium was minimal showing that it had received to much water.  The regiment for watering the plant was every four to five days giving the root system the opportunity to re-establish itself.  Several new aerial roots started to grow within just a week or two giving the plant a sense of new life.
     After the plant had been in the pot for six months, it proved to be establishing a strong root system.  With late spring temps now in the mid 80sF (29C-30C), the plant is watered every three days and fertilized once a week.  Keep in mind that most Angraecum seedlings and immature plant's root systems can start to rot rather quickly due to the fact the roots are very thin.
     Angcm. germinyanum does have a rest period.  Watering should be reduced and fertilizing stopped for about a three month period.  The plant can be misted between the watering every 5 - 6 days as long as the temps do not drop below 65 F (18C).  Resume a normal watering schedule when you see the growth season begin.  The plant can be re-potted as long as new roots have appeared; paying close attention to not disrupt the root system to harshly.
     With the amount of water that the plant is receiving and the fact that it is in a medium shade type of light, it is best that you be sure to treat the plant on a regular schedule of a systemic fungicide.  I use Thyomil and Dithane 45 on an alternating schedule.  Also make sure that the plant is in an area that will get a good air movement over it.       
     The amount of light that Angcm. germinyanum requires is considered a medium shade, about 1000 - 2000fc (footcandles).  This individual plant is presently receiving an average of 1300fc.  However, it does get direct sunlight for about an hour and a half when the sun first rises.  And absolutely no direct light after that time period.  It has grown about 1 1/2 inches (3.7cm) in the last six months.
 
Angcm. germinyanum seedling
 
     The Angraecum germinyanum seedling above is in its second year of being on the mount.  In the nearly two years, it has barely grown a 1/2 inch (1.3cm).  During the spring and summer growing season, it is watered (saturated) every morning and misted mid-afternoon.  It is my opinion that this seedling should have been kept in the flask longer than it was.  It is however growing a decent root system and as long as it is cared for and watched for any problems, whether those issues be insects (which was a problem the summer prior) or disease, it could eventually bloom; in about three to four years.
     As with any orchid or tropical plant, once a plant is established in a given area, it is best to leave it be in that area.  With the proper amount of water, fertilizer and light, it will bloom and become a mature specimen.


Sunday, May 12, 2013

Whats Light Got To Do With It? Part Two

     The presentation titled "Whats Light Got To Do With It" was given to the Boca Raton Orchid Society just a few days ago for the first time.  It was accepted very well by the members that were in attendance.  This post is a review of a post dated back in July 2012 and also a few bits of new information as well.
     I think it is imperative to understand the basic explanations of light when an experienced grower gives a hobbyist (especially a beginner) the light parameters for a plant to grow and eventually bloom.  I have witnessed to often a hobbyist nodding their head and walking away not really understanding what the grower has said.
     At any of the presentations that I give, I thoroughly explain to the audience to take a few moments and research the plant they have purchased.  The are numerous websites, forums and blogs that can supply specific data regarding just about any orchid in our collections. 
     Specializing in the Angraecum Alliance, I have reviewed many of the specific requirements for well over 600 species.  The light requirements will range from deep shade to bright sun light through various parts of the day. 
     It is very common to see a plants light requirements be given in the measurement of footcandles (fc).  Below are several different ways to measure the intensity of light so that you can determine where to place your plants (any type of orchid or plant) so that they can thrive and bloom as they should.

Measuring light levels with a Digital SLR camera:
     Set the ASA or ISO to 100
     Place a piece of white paper in the area you want to measure
     Fill the view finder of the camera with the white paper and be sure that your shadow does not
          interfere with the white paper (it is not necessary to focus)
     Take a meter reading, the following shutter speeds and fstops represent the following:
          1000 fc - 1/2000 @ f2.8
          1000 fc - 1/1000 @ f4
          1000 fc - 1/500 @ f5.6
          1000 fc - 1/250 @ f8
          1000 fc - 1/125 @ f11
          2000 fc - 1/2000 @ f4
          2000 fc - 1/1000 @ f5.6
          2000 fc - 1/500 @ f8
          2000 fc - 1/250 @ f11
          2000 tc - 1/125 @ f16
          4000 fc - 1/2000 @ f5.6
          4000 fc - 1/1000 @ f8
          4000 fc - 1/500 @ f11
          4000 fc - 1/250 @ f16
          4000 fc - 1/125 @ f22
          8000 fc - 1/2000 @ f8
          8000 fc - 1/1000 @ f11
          8000 fc - 1/500 @ f16
          8000 fc - 1/250 @ f22
     If your camera does not set lower than an ISO 200, set it to the 200 and double the footcandles.

Using a photographers hand held light meter:
     Set the light meter to an ASA or ISO to 100
     Make sure the the white cap is covering the meter for ambient light only
     Have the meter pointing up toward the light source and then take the reading
     Once the accurate reading is set, the EV numbers will indicate the footcandles equivilent:
          EV 10 - 168 fc
          EV 10.5 - 336 fc
          EV 11 - 478 fc
          EV 11.5 - 673 fc
          EV 12 - 951 fc
          EV 12.5 - 1345 fc
          EV 13 - 1903 fc
          EV 13.5 - 2601 fc
          EV 14 - 3805 fc
          EV 14.5 - 5382 fc
          EV 15 - 7611 fc
          EV 15.5 - 10763 fc

Your light source, your hand and a sheet of white paper:
     Place a sheet of white paper in the area that you wish to place a plant
     Place your hand twelve inches above the white paper with the light source above
     Looking at what happens to the shadow will determine the type of light you have:
          A very distinctive shadow exists with sharp edges: Vandaceous type light (5500 - 8000 fc)
          The shadow has softened greatly, edges are soft: Cattleya type light (1200 - 5500 fc)
          There is NO shadow at all, appears overall muddy: Phalaenopsis light (150 - 1200 fc)

Be sure to keep an eye on the seasonal position of the sun.  It is highest in the sky with short shadows during the summer (June 21st the longest day) while the sun is lowest in the sky with extremely long shadows during the winter (December 21st the shortest day).    


Monday, February 25, 2013

Angraecum leonis (Size Identifies)

     In August of 2012, the initial post regarding Angraecum leonis was published in the blog.  Since then, I have received numerous emails and questions dealing with the two varieties of Angcm. leonis.  The questions center around the distinctive differences between Angcm. leonis from Madagascar and Angcm. leonis from the Comoro Islands.  This post will give a visual description of the two varieties along with a review of the culture that I use to grow these phenomenal plants.
     As stated in the original post, the Angcm. leonis from Madagascar is the smaller of the two varieties.  It grows at the very northern tip of Madagascar at about sea level where the annual rainfall is nothing compared to the amount of rain that the variety from the Comoro Islands receives.  The amount of rainfall has a big play into the size of the two varieties. 
     With less rainfall, the Madagascar version is usually half the size.  The leaves are shorter but are very fleshy.  The thickness of each leave can be 2 - 2 1/2 times as thick.  The leaves hold moisture due to the fact they receive less rain.  As I have shown with other Angraecums, when the plants are exposed to more moisture, they have a tendency to become larger plants.  When they are not, they adapt to survive.

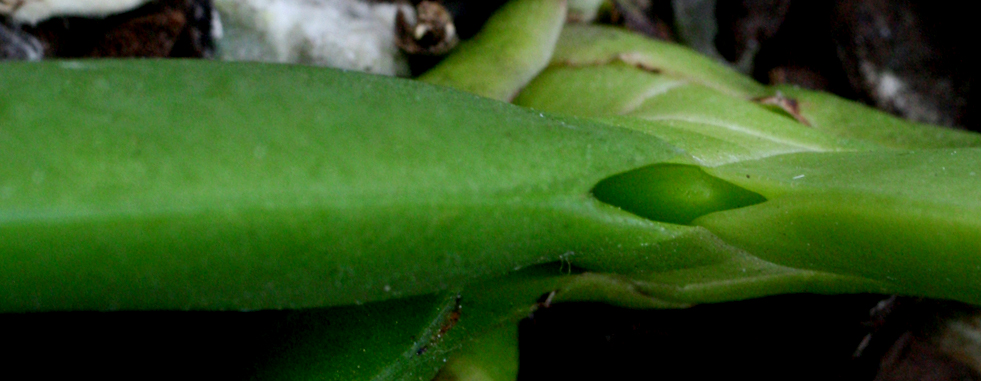
Angcm. leonis (Madagascar version) the thick fleshy leave
                                      retains what moisture it can get due to the dry climate.
 
     The leaves of the Madagascar version are about half the size on a mature plant compared to the version from the Comoro Islands.
 
Angcm. leonis (Madagascar version) the longest leaf on this
                                      mature plant is less than half the size of a leaf from the
                                                               Comoro Islands version.
 
Angcm. leonis (Comoro Islands version) the leaves on each
side of the plant are just about the same length.  Can reach
an overall combined width of 14 plus inches (35 cm) on a
well established mature specimen.
 
     Both versions of Angraecum leonis will do well mounted to a cork or a tree fern slab.  During the warmest part of the growing season, the plants must be watered daily with an additional misting later in the afternoon.  If you see that there are wrinkles forming in the leaves, hydrate the plant several times a day until the wrinkles start to disappear.  If the plants have been mounted with any moss around their base, be sure to thoroughly soak the material (it will dry out quickly during the summer heat and with any breeze blowing).
     Either version can be potted or placed in baskets with a fast drain medium.  The roots of plants that have been placed in pots can develop root rot if not allowed to partially dry.  Very often when the leaves start to show wrinkles, it can also spell out the fact that the roots have rotted and the plant is not getting sufficient moisture even if you're watering on a regular basis. 
     Keep an eye on potted plants!  In sub-tropical and tropical climates, it is best to use a non-organic material when potting or placing plants in baskets.  This very warm and humid climate will brake down the organic mediums very quickly forcing you to change the medium more frequently.  This does not bode well for the root systems.
     Flowers of the two versions of Angraecum leonis is also another tell tale sign as to the identity of the plant.  The Madagascar version of Angcm. leonis is only about 1 - 1 1/2 inches (3-4cm) wide and about 1 1/2 - 2 inches (4-5cm) high with a nectary/spur about 2 3/4 - 4 inches (7-10cm) long.  The Comoro Islands version is about 2 1/4 - 3 inches (6-9cm) wide and about 3 inches (8cm) high with a nectary/spur of about 3 1/2 inches (9cm) long.  Both versions are scented and can last up to four weeks if the plants are not exposed to harsh weather while in bloom.
     One last visual point of difference between the two Angcm. leonis versions is the shape or the bends of the nectary/spur.  The nectary of the Comoro Islands version goes back behind the flower draws down and then comes forward underneath the flower.  The Madagascar version will go behind the flower, draw down and as it comes forward reverse again to form the letter 'S'.  These are common traits but keep a mental note that not everything is written in stone.
 
The Comoro version on the left while the Madagascar version
is on the right showing the letter 'S' in a developing bud of
Angraecum leonis.
 
     No matter what version you are growing, you will be very pleased once the plant starts producing flowers on a yearly basis.